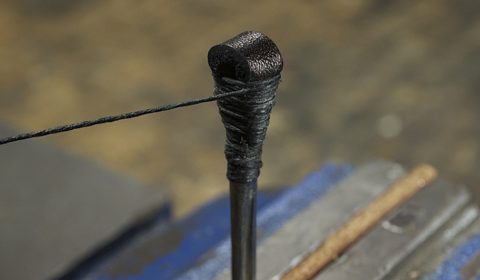
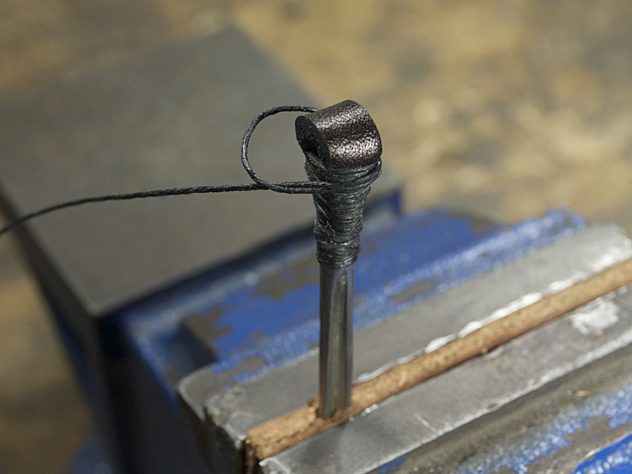
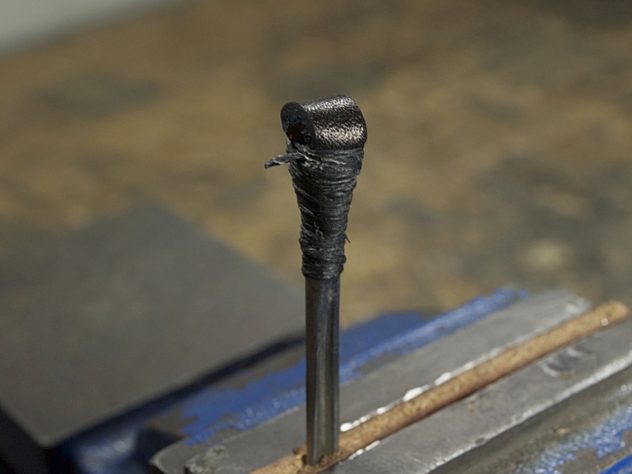
Fencing Target Practice at Home

Fencing target practice at home helps perfect basic and complex actions to stay in top shape for class and assaults. Our practice targets can be used by all levels of fencers to practice a variety of techniques and actions.

Below are sample drills for all our targets starting with our Foil Practice Target for practicing structure and attacks at your own pace. The Hanging Practice Ball adds a moving target and timing and is especially valuable for epee fencers. The most versatile is the Target & Ball combo that allows for all previous drills and some of the more complex exercises.

Remember, it’s up to you to deliberately practice the skills you’ve learned in class such as complete extensions, exact hand positions, and flawless lunges. Take your time; this practice is for you.


Wall Target

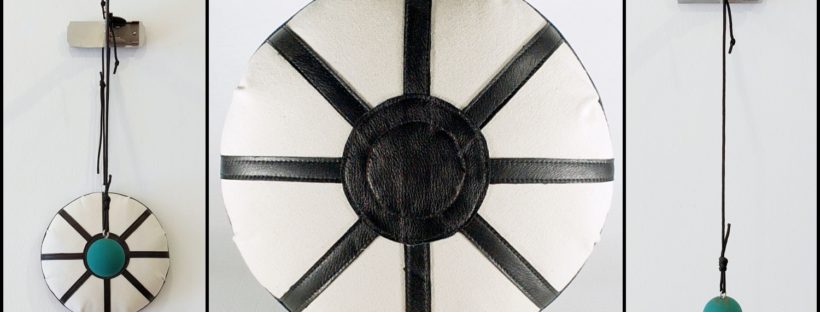
Our Foil Practice Target features a felt-covered wood backboard with 2″ upholstery foam to cushion the impact of your strikes. The target has a center bulls-eye and horizontal, vertical, and diagonal target rails. The vertical and horizontal rails divide the target into four quadrants representing the four lines of attack. The diagonal rails represent the “bull’s eye” for each quadrant.

Fencers may first warm up by practicing on the center bulls-eye and then start specifically targeting each diagonal rail with the corresponding hand position.

Drills

Accuracy

Measure your lunge distance to the target and practice hitting the exact center. Carefully practice fully extending your arm before lunging, the position of your hands, shoulders, knees, and recovering to a proper guard.
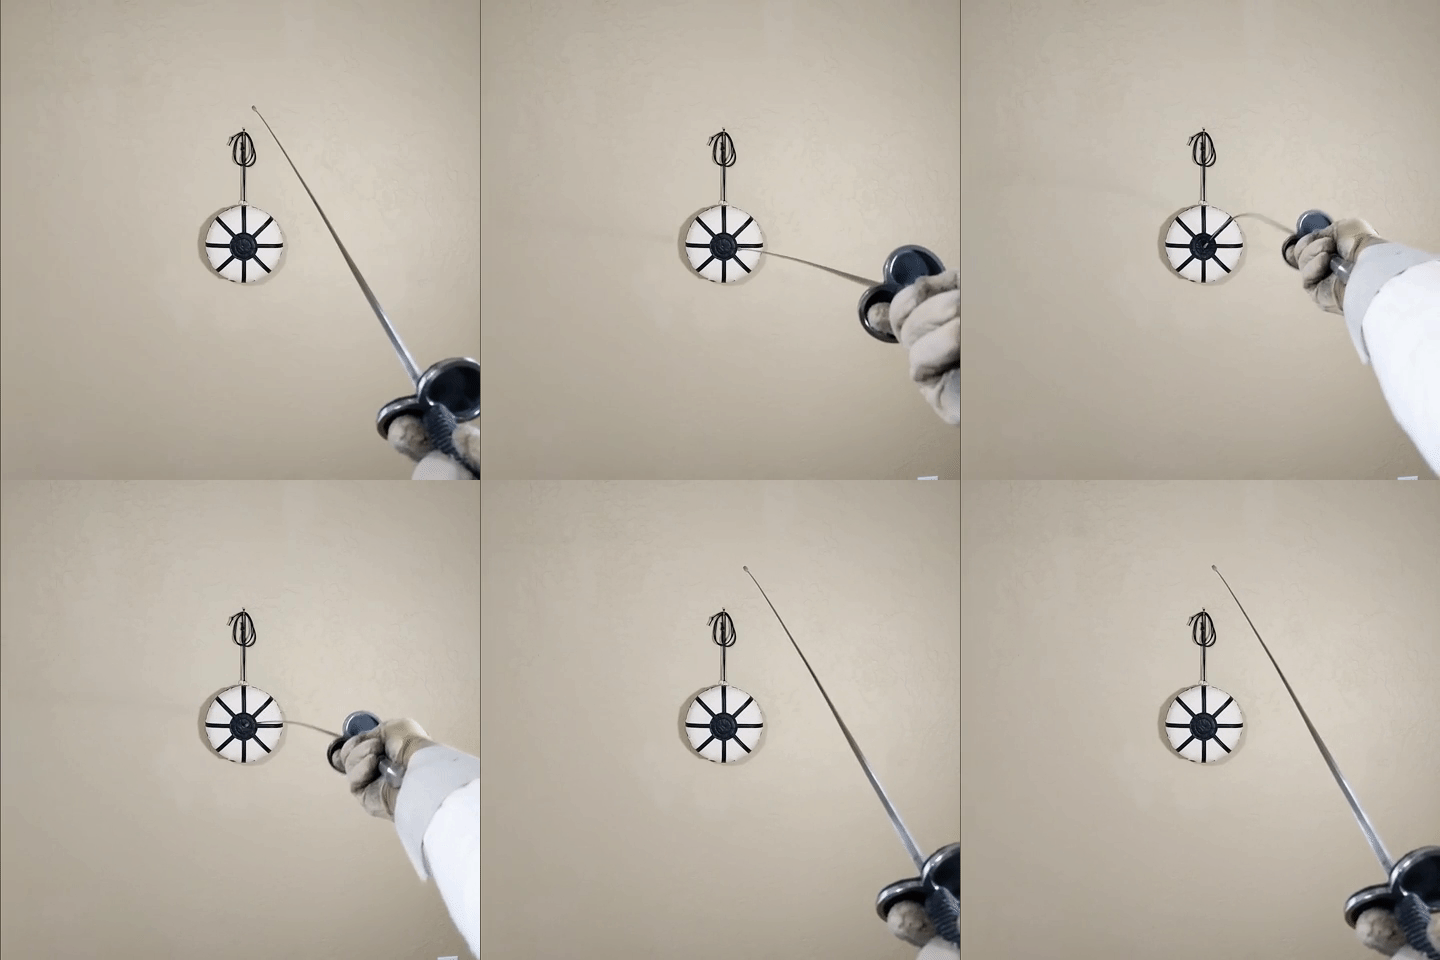
fencing target practice at home on the bulls eye

Quadrants

Extend and lunge at each diagonal rail with the corresponding hand position (French school’s 6, 4, 7, 8, for example). These quadrants represent the four lines of attack.

Advanced: Practice less common hand positions, such as the French school’s 1, 2, and 3 positions.
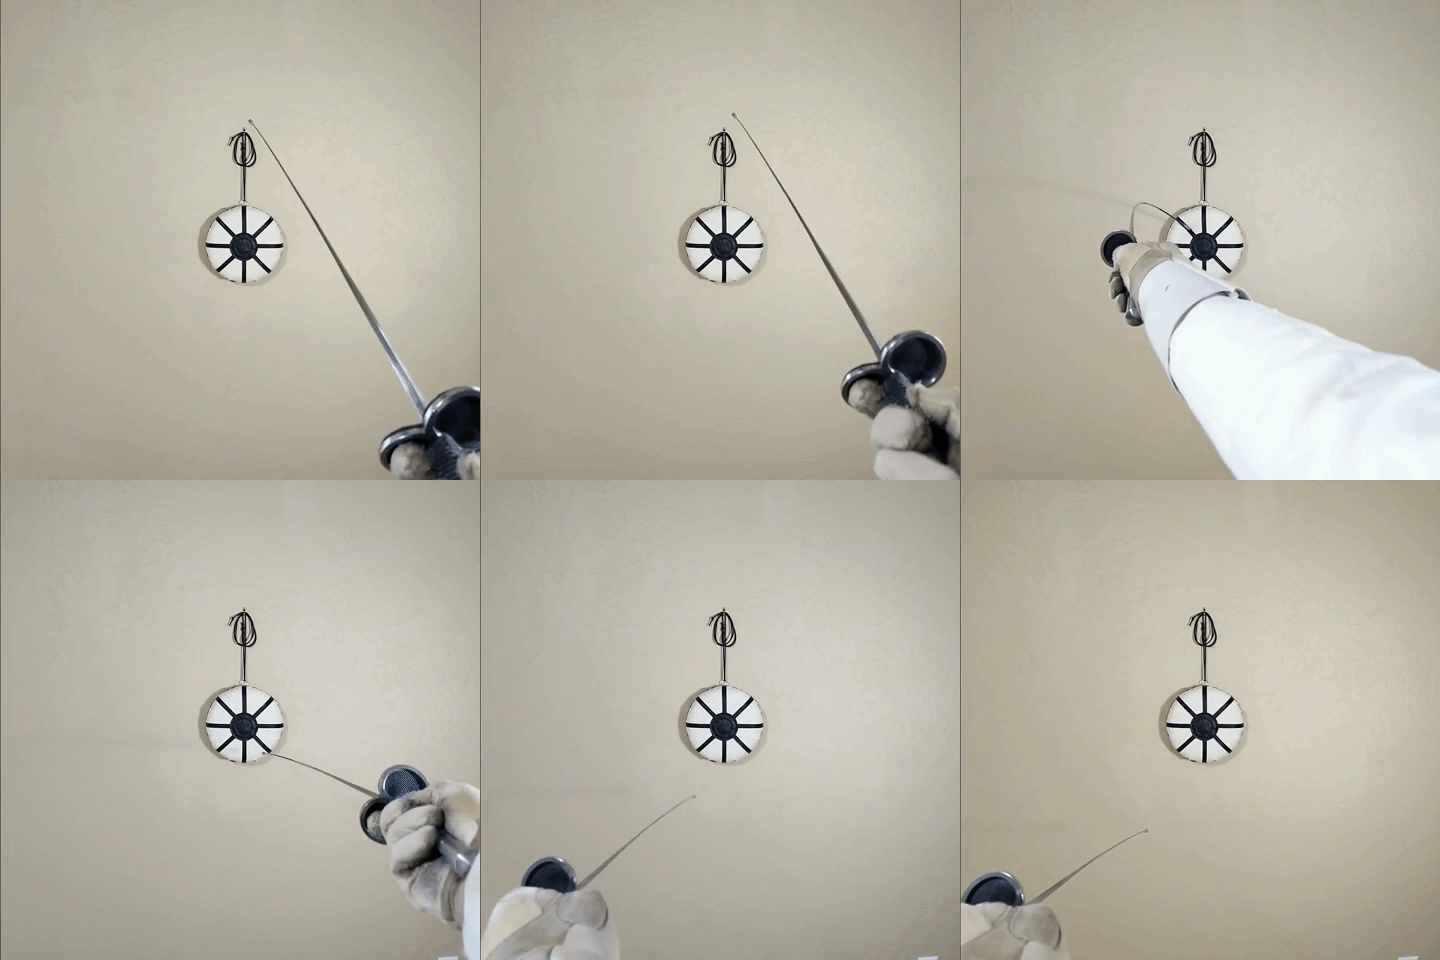
attacking four quadrants on the fencing wall target

Compound Attacks

While in full extension practice compound attacks by feinting at various diagonal rails. Practice any and all compound attacks you’ve learned in class.
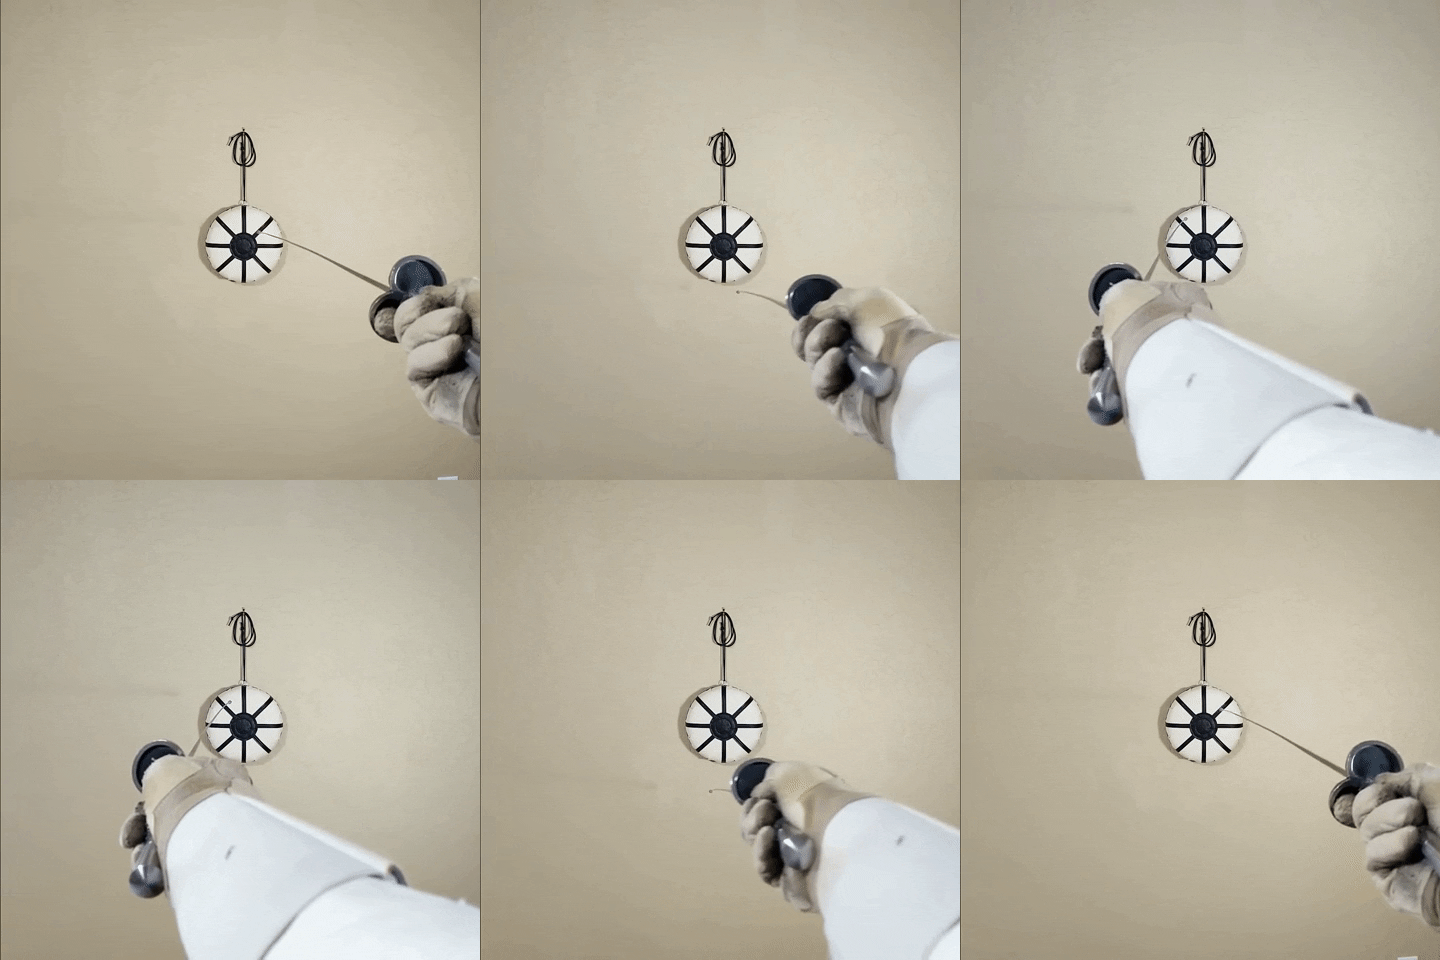
Feinting agains the wall target

Reposts

Measure extension distance to the target and set yourself on guard in any hand position. Repost at this close range to the direct line corresponding to your hand position. The difference of this drill to the “Quadrants” drill is being in extension distance rather than lunge distance, therefore simulating a repost after a parry.

Advanced Variation: Same as above, but repost while holding a lunge at lunge distance to practice counter-reposts.

Advanced Variation: Instead of reposting in the direct, straight line, repost off-line (diagonally or laterally).
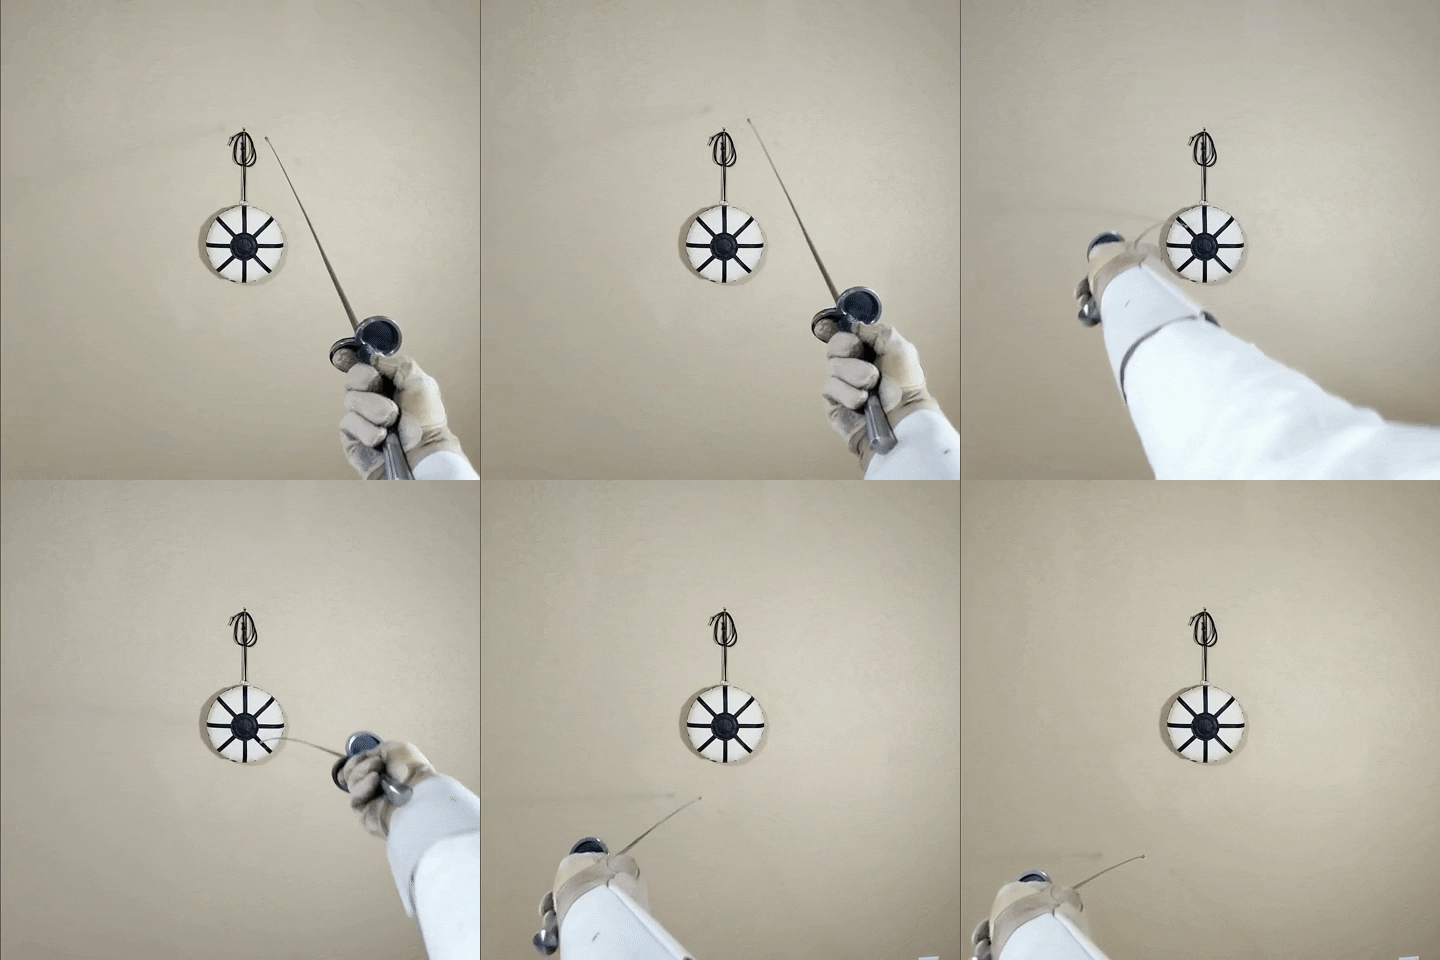
reposting from extension distance for fencing target practice at home

Hanging Ball

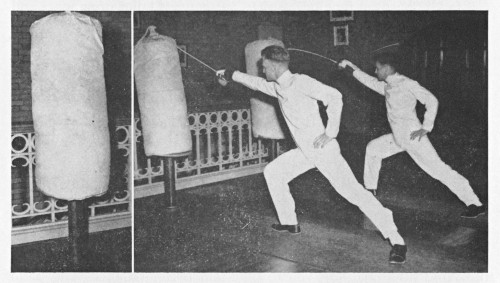
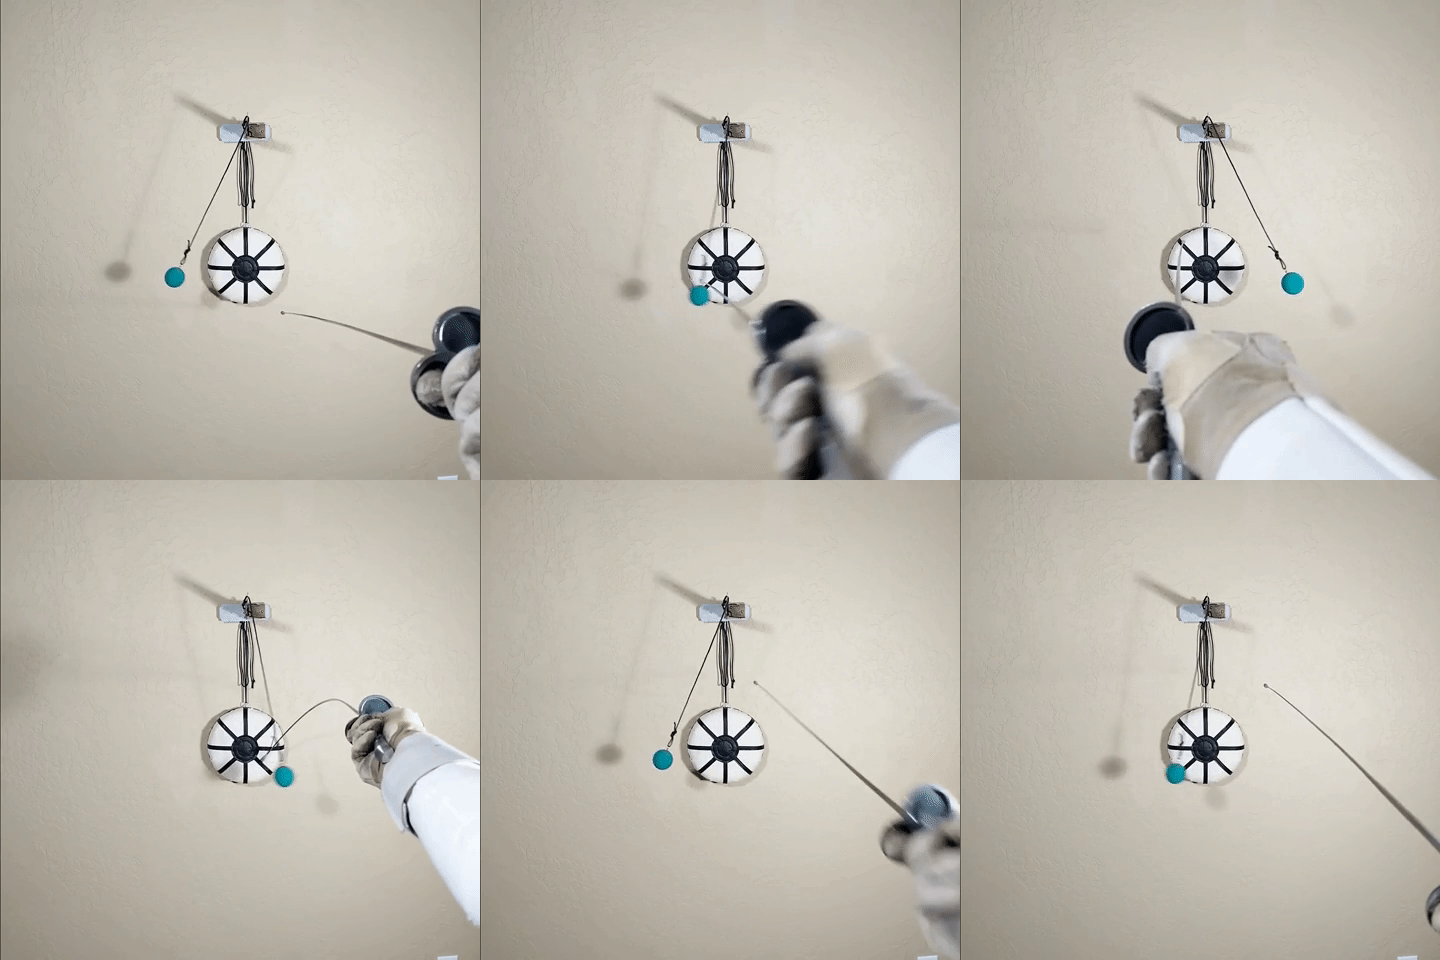
Most fencers have seen or heard of practicing with a hanging ball like in the photo below. Our hanging ball is wall-mounted on a shorter string (shorter than from the ceiling, for instance) so that the pendulum tempo can be more representative of an adversary’s weapon in motion.

The hanging ball does not resist your strike like a wall target does, so practice on the ball removes the expectation of resistance upon a hit and therefore encourages your attacks to be exact and controlled.
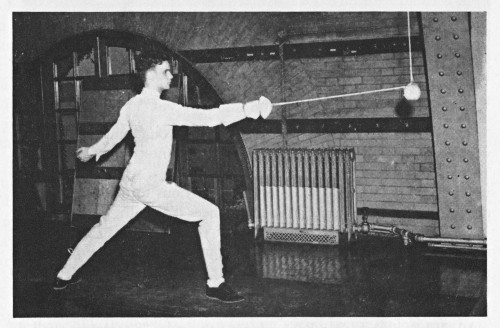
From Modern Fencing (1973 ed.) by Clovis Deladrier, former Maitre d’Armes of the Belgian Army (1906-26) and Head Fencing Master at the U.S. Naval Academy from 1927 until his death in 1947. See More Images.

Drills

Hitting a Moving Target

Take your extension distance to the ball and practice hitting the ball in motion. Don’t wait for the ball to be completely stationary to attack again. Practice in all hand positions and be mindful to return to a complete guard before the next attack.

Advanced Variation: Expand the distance to demi-lunge, lunge, or advance-lunge distance.
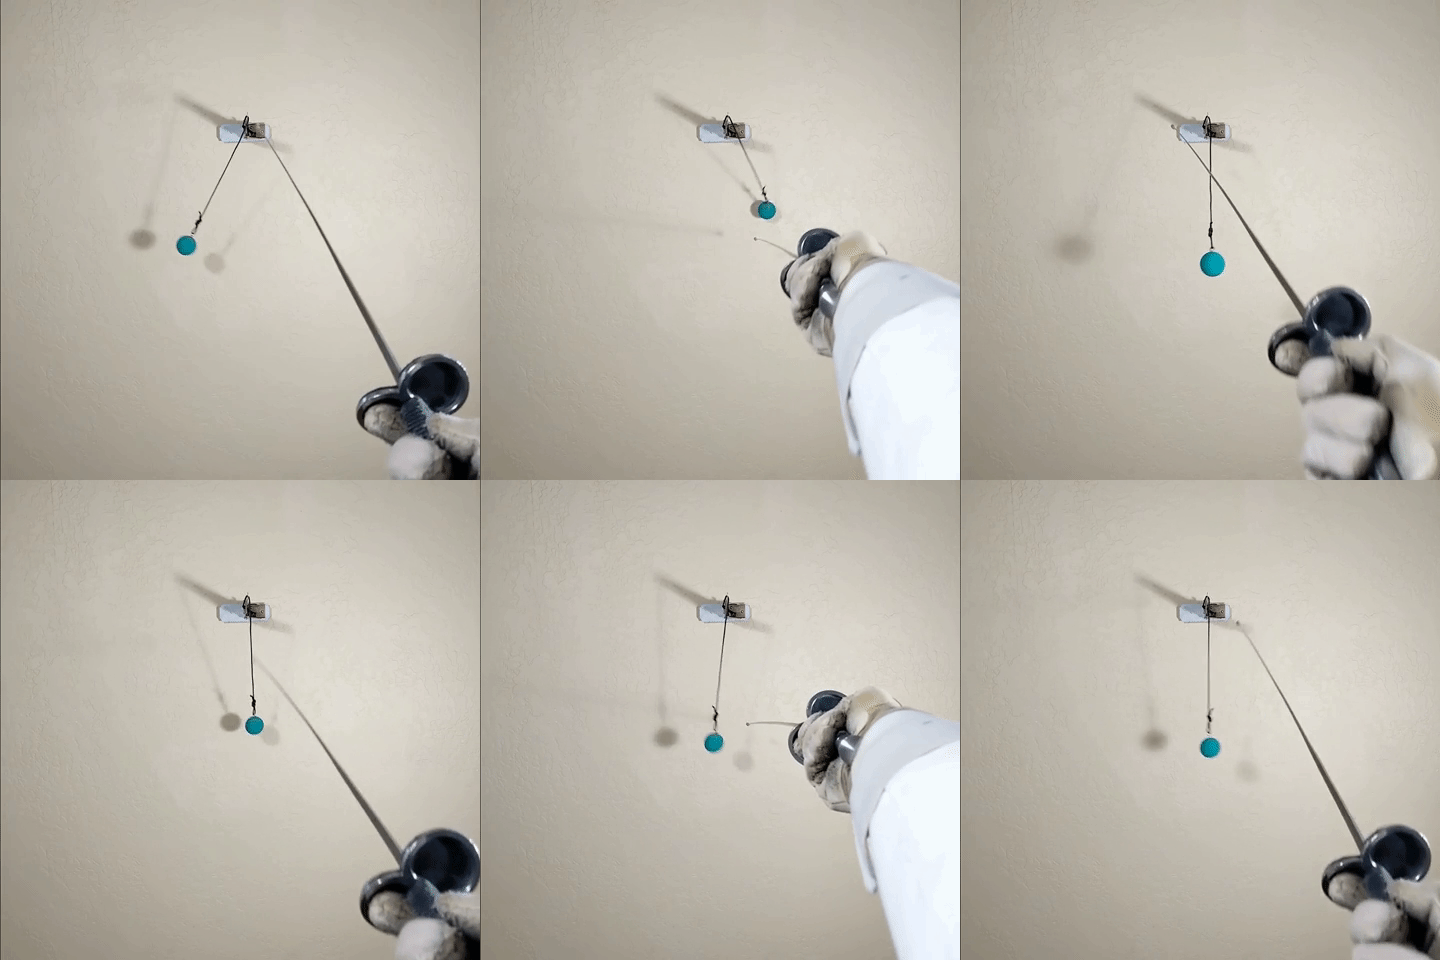
attacking a moving target

Deception

The swinging ball can represent your opponent’s attempt to take your blade. Position yourself on guard at a close enough distance so that the point of your weapon is one inch past the ball. Set the ball swinging side to side and practice deceiving around the ball into finished hand positions.
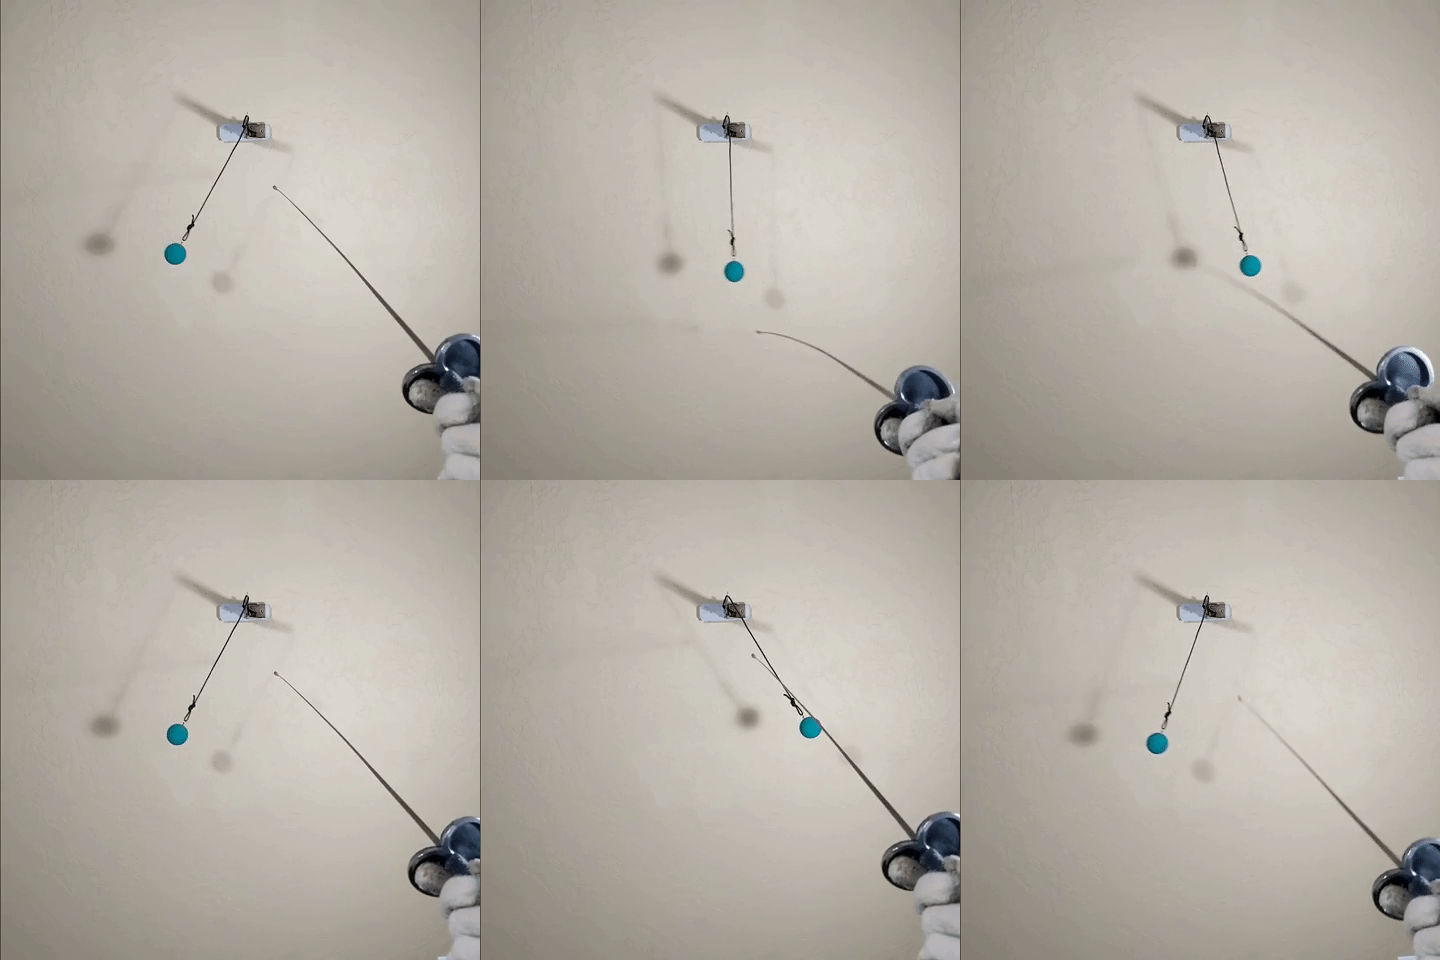
deceiving a swinging ball for fencing target practice at home

Stop Thrust

Set yourself on guard at extension distance to the ball and set it swinging lightly front to back. Hit the ball as it swings back towards you with a stop thrust.

Advanced Variation: The same as above but with a lunge-back in a variety of hand positions.
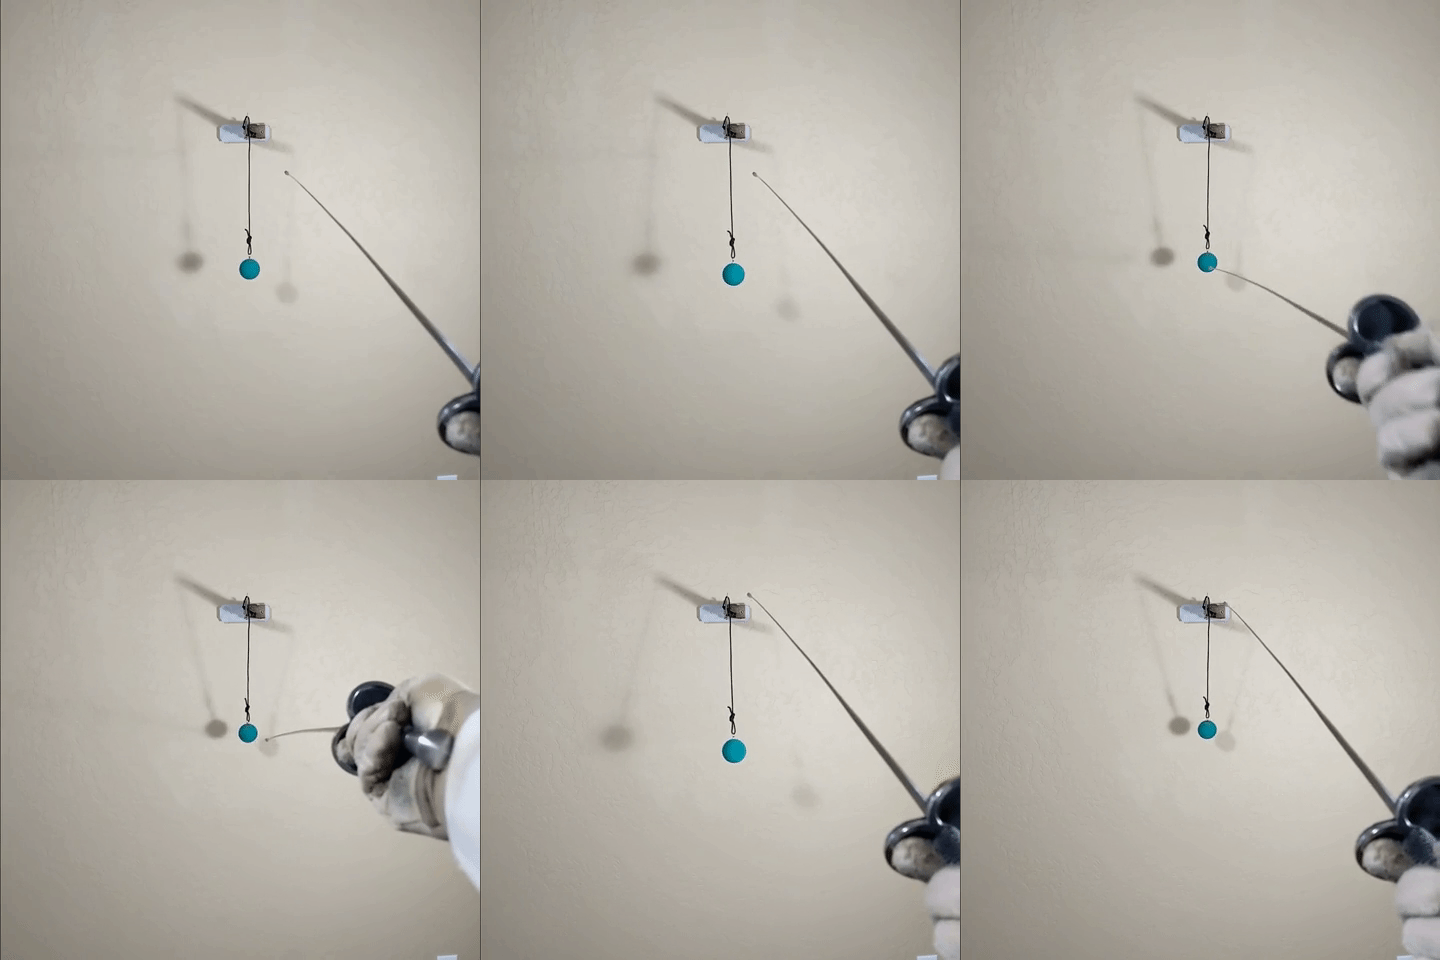
Stop thrusting the swinging ball.

Target & Ball

The two of these targets together gives fencers the most drill variety for fencing target practice at home with all the above exercises as well as a few that are unique to having both targets together.

The hanging ball can be raised or lowered to swing in front of (and protect) the wall target’s high or low quadrants.

Note: If you already have one of our wall targets you can easily suspend it from the hook incorporated into our hanging ball’s mounting plate.

Drills

Attacking Around the Ball

Position yourself at lunge distance to the wall target and set the ball swinging side to side. As the ball reaches it’s apex on one side, and starting from any hand position, fully extend and lunge to one of the two quadrants protected by the ball. Set the ball high to protect high-line quadrants and low for low-line quadrants.

Note: In the French school, if the hand is properly angled (thumb at 1 o’clock or 11 o’clock) the blade will bend around the hanging cord.
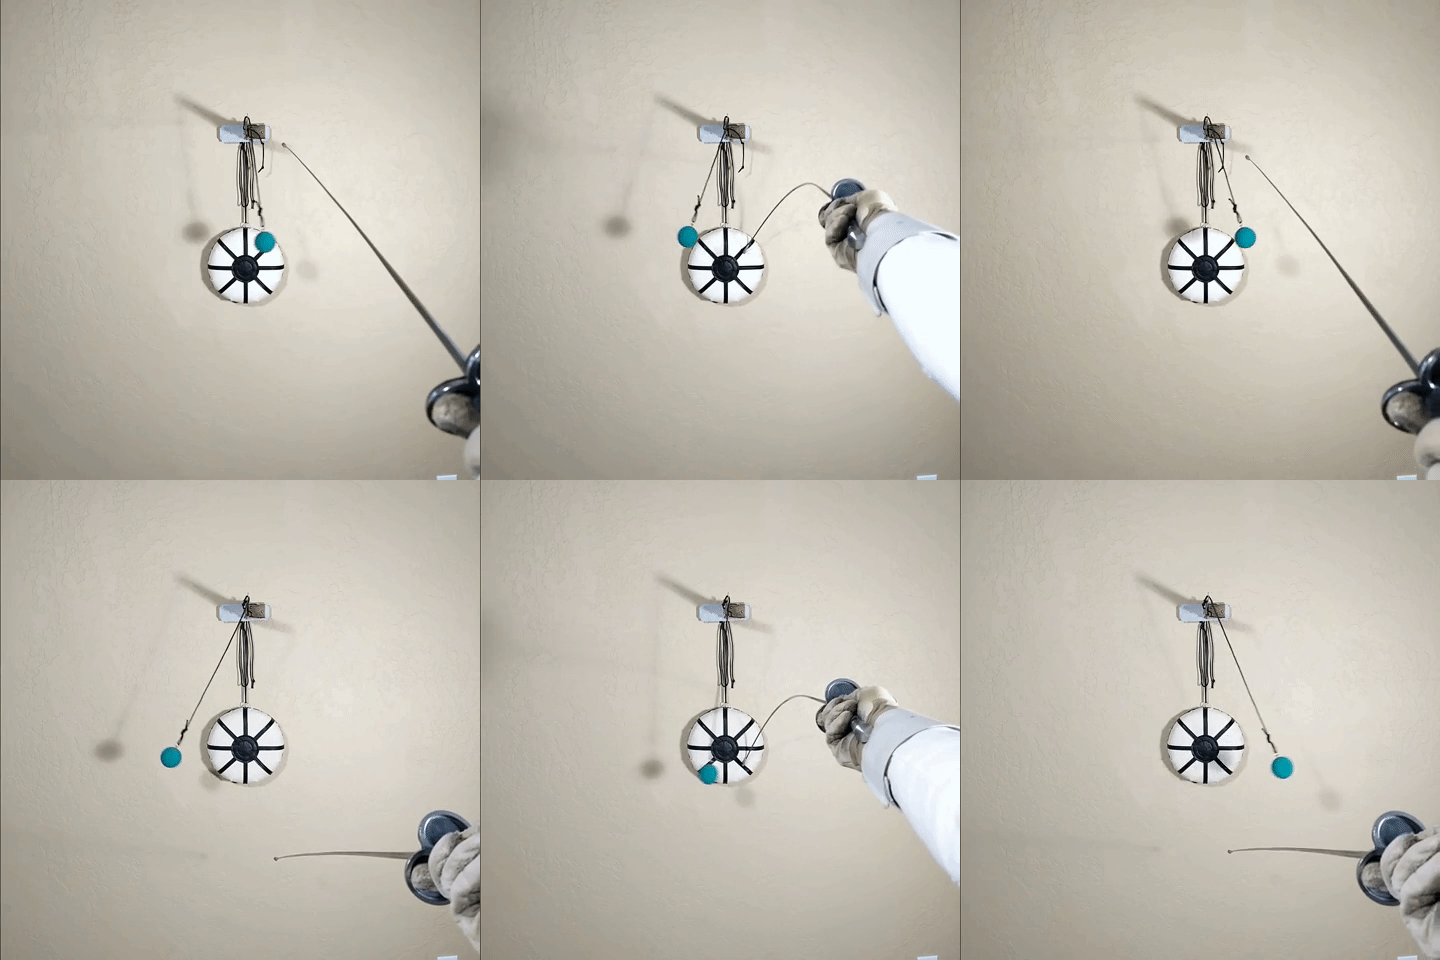
fencing target practice at home with wall target and ball

Compound Attacks Around the Ball

Position yourself at lunge distance to the wall target and set the ball in a low position swinging side to side. As the ball reaches its apex on each side, feint with full extensions to the opposite lateral or diagonal lines. Lunge after one, two, or three consecutive feints.

More Variations

There’s lots more fencing target practice at home than what we can include in this blog. Ask your instructor for more drills and they’ll surely provide you with more and likely with some tuned to your specific training needs.

Shorter or Taller Adversaries: The wall target should be set so that the bull’s eye is at the height of your sternum. Advanced fencers can raise or lower the target to simulate shorter or taller opponents. The hanging ball can be adjusted similarly.

Add Footwork: Set yourself farther away from the target and practice additional footwork with your attacks such as advance-lunge or pass-forward lunge. Advanced fencers can incorporate a swinging ball to practice their own footwork and bladework against an opposing tempo.


Mounting and Adjusting

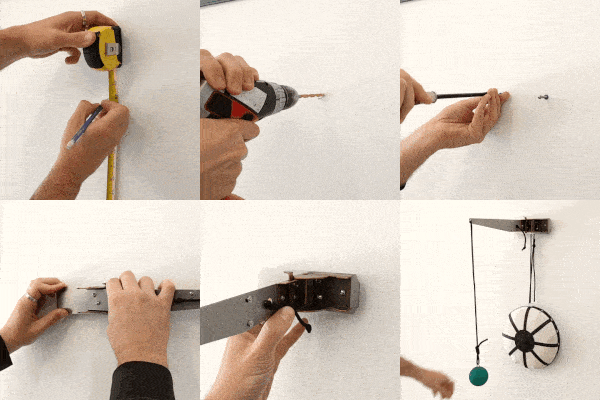
Our wall targets and hanging balls include all necessary mounting hardware. We recommend mounting both at 62″ from the floor regardless of your own height.
Adjusting for Height

Once mounted, all our targets can be raised or lowered with the cord to adjust to any fencer’s height. We recommend setting the wall target’s bull’s eye at the height of your sternum.

Mounting Instructions

Mounting instructions for each target can be found on the following pages:
Clovis Deladrier’s Target Practice and Warm Ups

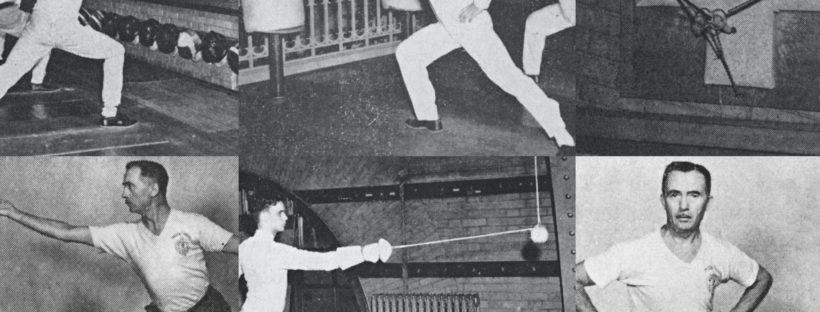
Clovis Deladrier (b. 1886 d.1947) was the Maître d’Armes of the First Infantry Regiment and the 12th Artillery Regiment of the Belgian Army (1906-26) and Head Fencing Master at the U.S. Naval Academy in Annapolis from 1927 until his death in 1947. In the very last pages of his text, published only a year after his death, featured the following photographs of Maître Deladrier’s students’ target practice and Maître performing warm-up exercises.

Clovis Deladrier, “Modern Fencing”, Arco Publishing Company, New York, 1973.


Warming-up Exercises. Before going into a bout or a lesson, the fencer should practice the exercises demonstrated in the following photographs until he feels warm and relaxed.

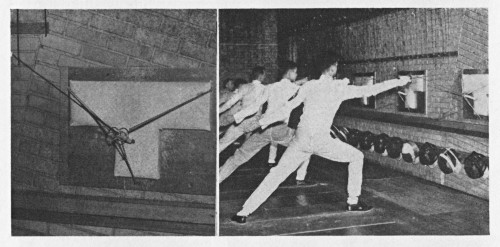
Fig. 1. Dummy Foil for target practice.
Fig. 2. Group practice on dummy foil.
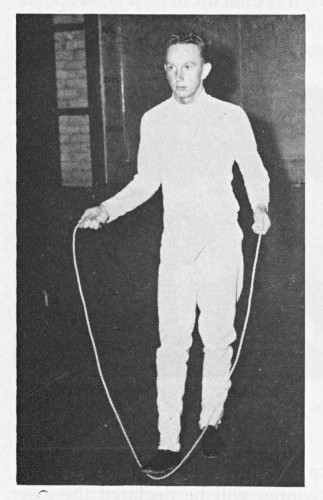
Fig. 3. Warming-up exercise.
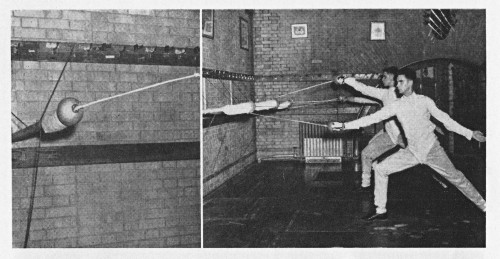
Fig. 4. Swinging ball for épée practice.
Fig. 5. Dummy épée for target practice.
Fig. 6. Group practice on dummy épées.
Fig. 7. Sabre dummy.
Fig. 8. Practice on sabre dummy.
Fig. 9. The Naval Academy fencing loft.

Hugo Castello’s Fencing Warm Ups

Fencing warm ups and conditioning are key components to becoming a powerful fencer. They help tone, strengthen, and attune one’s body to one’s will.  In his book Fencing, Hugo Castello outlined a series of exercises and warm ups for fencers. Hugo Castello succeeded his father, Julio Castello, as the coach of New York University’s fencing program in 1947.

Castello, Hugo & Castello, James. Fencing. The Ronald Press Company. New York. 1962. Pages 83-89.


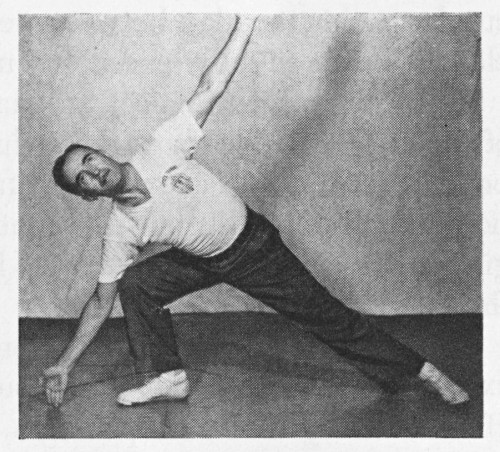
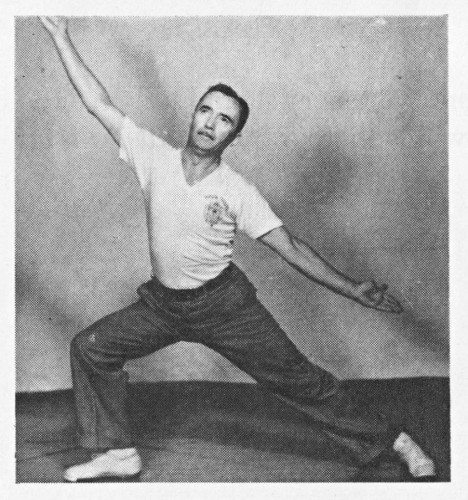
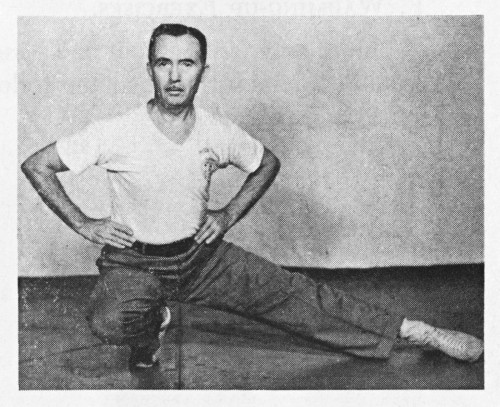
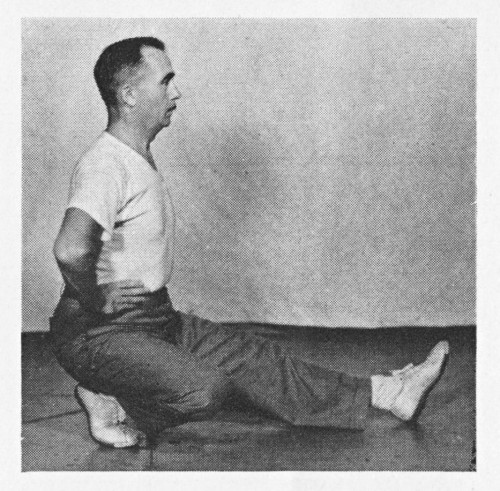
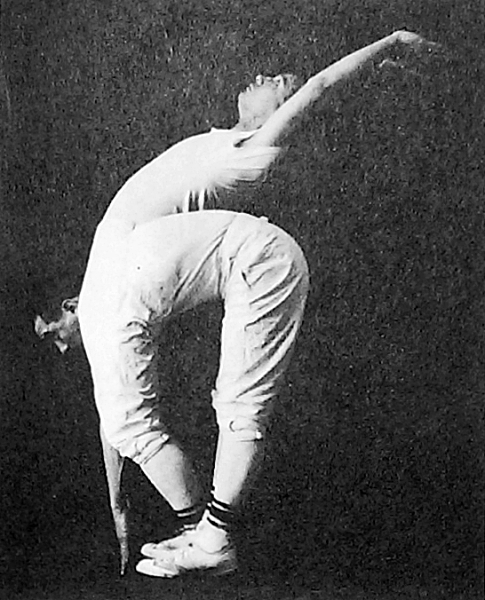
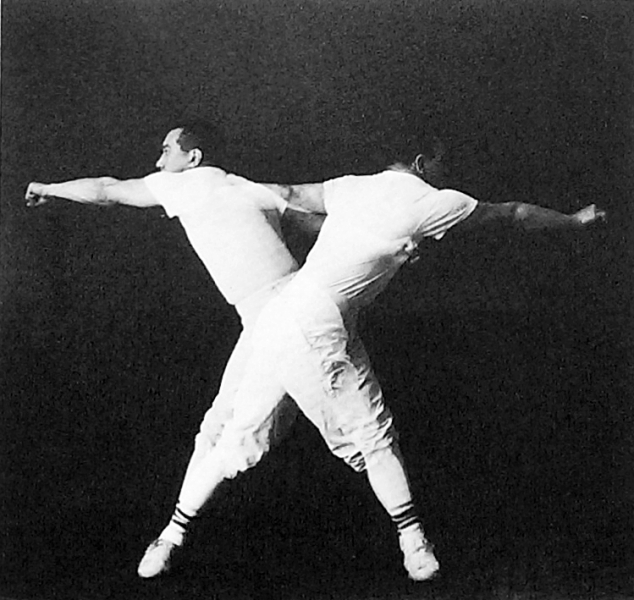
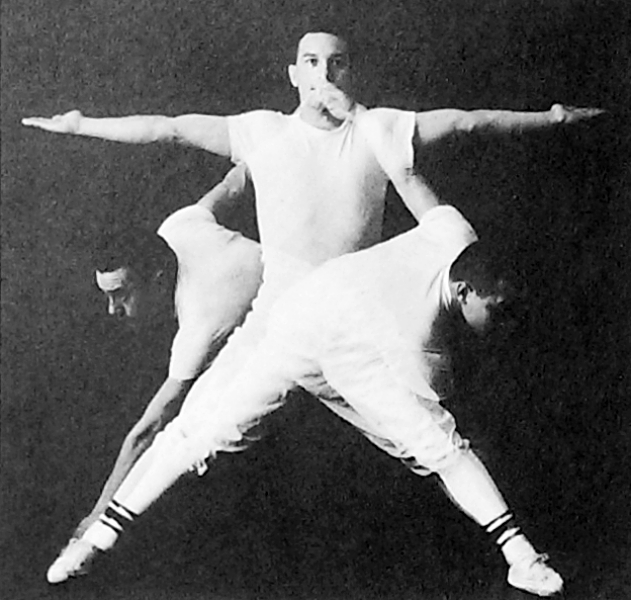
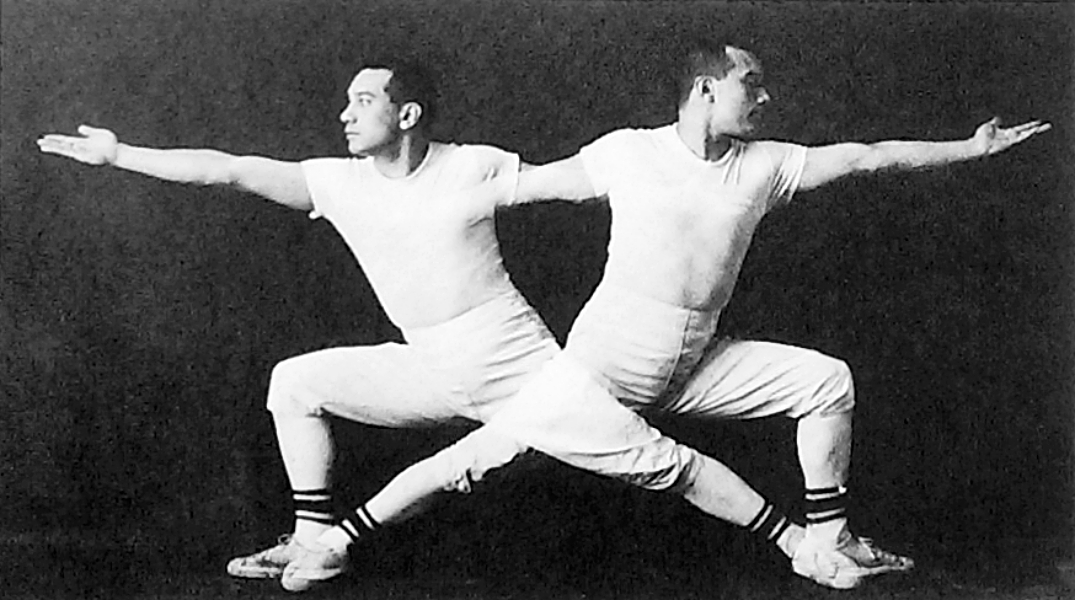
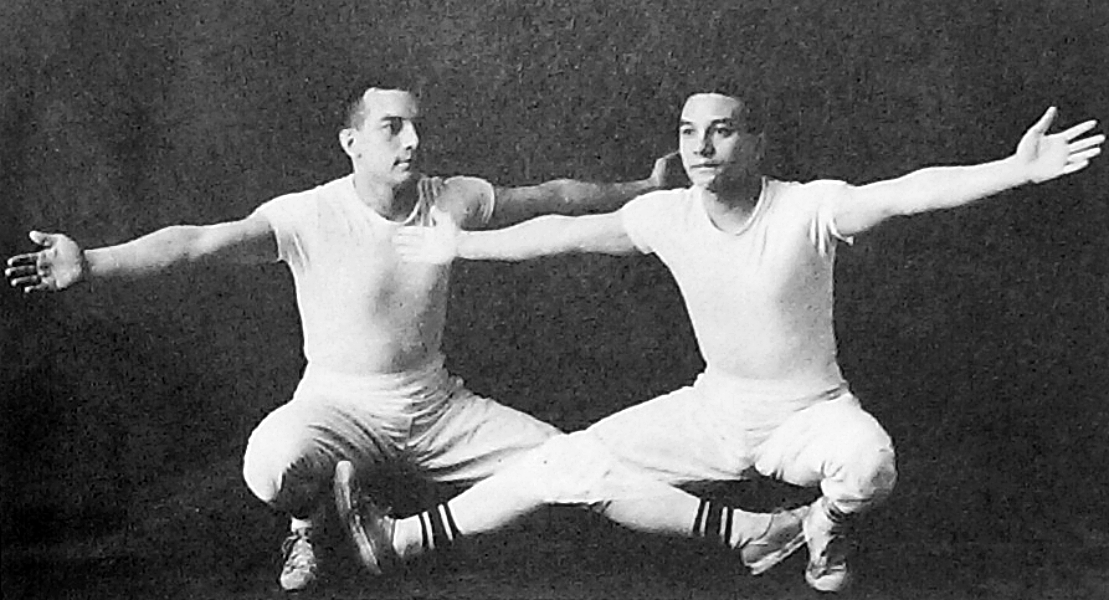
Warm-Up Exercises for Fencing. The following exercises (as illustrated) are of special importance to the fencer, and should form part of the regular warm-up period:

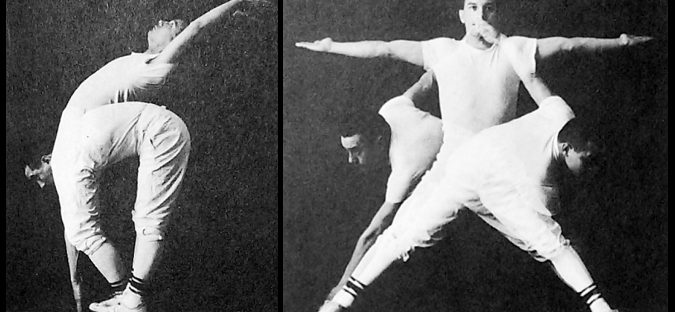
1. From attention, bend and touch the floor in front of the toes (keep the knees straight). Recover and reach overhead and back, flexing the back as far as possible. Repeat.

Hugo castellos fencing warm ups

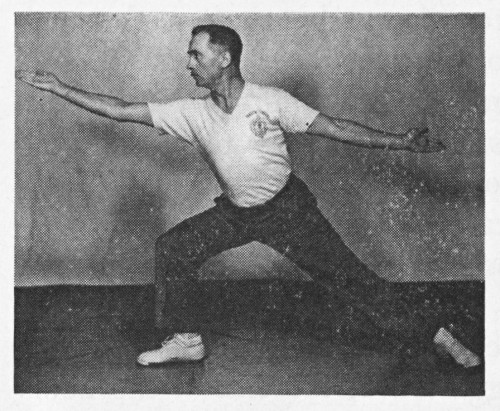
2. From stride position, with arms extended at the sides at shoulder height, turn the trunk from the hips as far to the right as possible; repeat to the left.

Twist at the waist

3. From stride position, with arms extended at the sides at shoulder height, reach and touch the right toe with the left hand, recover, repeat to the left.

Toe touches to warm up for fencing

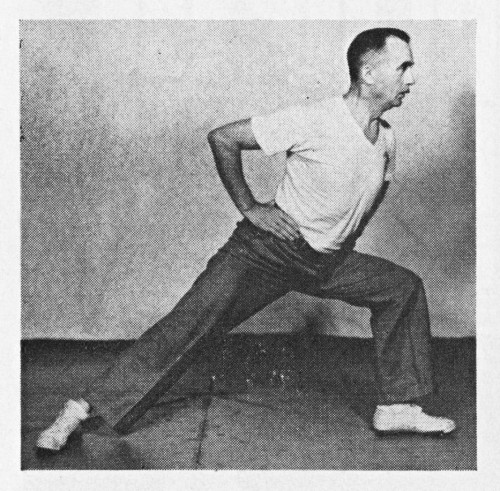
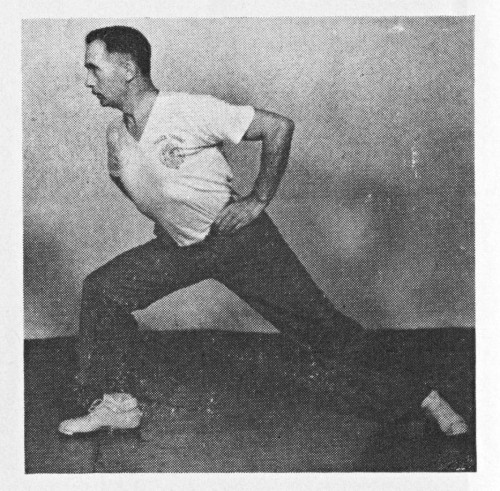
4. From the On Guard position, lunge on the right leg. Without recovering to the On Guard, shift the position of the feet 90 degrees and lunge on the left leg. Repeat.

Lunches to warm up for fencing

5. From the lunge position, turn on the heels and sink into a deep knee bend position on the lead leg. Recover to the lunge position. Reverse the lunge and repeat on the other side.

Deep knee bends

The regular fencing footwork-on guard, advance, retreat, lunge, advance and lunge, fleche, and combinations of these actions-should also form part of the preliminary warm-up.

Fencing sword makers marks Solingen, G. Pion and Prieur

Using the Country of Origin to Date Fencing Swords

Using the Country of Origin Mark to Date Fencing Swords

I am frequently requested to examine, appraise, or date fencing swords and thought I would share how the country of origin mark can be used to date fencing swords. It’s a useful tool when assessing purchases at auctions or antique shops.

In 1890 during a protectionist wave, the United States congress put into law the Tariff Act of 1890, aka the McKinley Tariff Act, which raised the average tax on imported goods up to nearly 50%. In addition, to educate consumers, the bill required all goods imported into the United States for sale had to be permanently marked with the country of origin in the English language.

Sec. 6. That on and after the first day of March, eighteen hundred and ninety-one, all articles of foreign manufacture, such as are usually or ordinarily marked, stamped, branded, or labeled, and all packages containing such or other imported articles, shall, respectively, be plainly marked, stamped, branded, or labeled in legible English words, so as to indicate the country of their origin ; and unless so marked, stamped, branded, or labeled they shall not be admitted to entry.

Fencing weapons were no exception. Independent of the blade’s makers mark, which indicated the manufacturing firm, if the blade also bares the county of origin it was likely produced after  this tariff act went into effect in 1891.


Applies Only to Markings in English

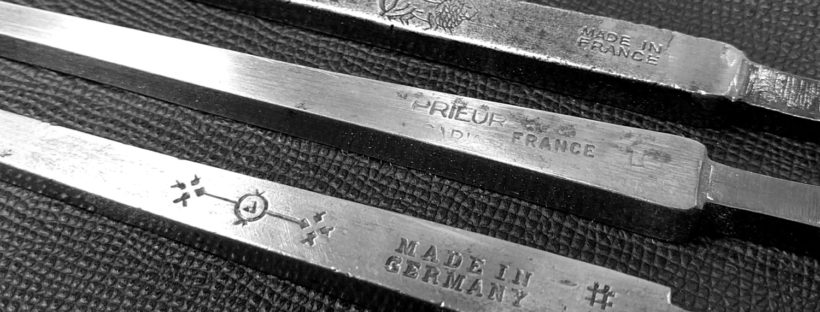
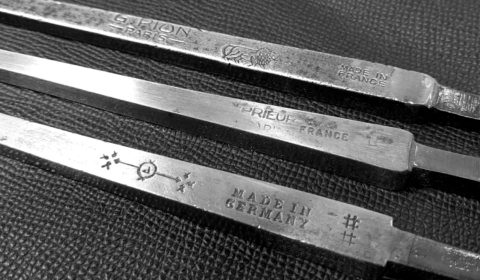
If the blade’s county of origin mark is clearly written in English, i.e. “Made in France” then the blade was certainly stamped in accordance with the 1890 Tariff Act and was imported into the United States for retail after 1891. Keep in mind, too, that “Germany” is the English word for that county, and thus indicates the same post Tariff Act production. There are exceptions, as the English word “France” is also the French word for France, and some French makers marked blades with “France” prior to 1890. Below you can see a Solingen (Germany) foil blade (bottom) with the English stamp “Made in Germany” and two French-made blades. The G. Pion blade (top) is marked with the English “Made in France” while the Prieur blade simply with “France.”

Fencing sword makers marks Solingen, G. Pion and Prieur

This does not mean that the blade was made before 1891 if there is no country of origin mark! The Tariff Act of 1890 labeling mandate only applied to goods imported into the United States, for retail in the United States. Tourists visiting the Souzy Paris retail shop in Paris could have bought souvenir foils and brought them back to the US, and those foils would not have been marked “Made in France.” European retailers would also not be required to mark their products in accordance with US law. This marking convention allows us only to sleuth the provenance on a fraction of individual foils found with the country of origin mark and does not guarantee pre-1890 origins if not present.

City Name Exception

City names are an exception to this rule, as swordmakers in Solingen and Klingenthal (and others) used their city’s name and reputation as part of their branding. These city names alone do not indicate a post 1891 production date.

For example, If we found a fencing foil with a blade marked “Coulaux & Cie Klingenthal” we can narrow its production to between 1850 and 1962,  when Coulaux & Cie. was documented to be making fencing blades in the city of Klingenthal. If the blade also contains “Made in France” – or possibly even just “France” – we may further narrow the fencing sword’s manufacture to between the Tariff Act of 1891 and Coulaux’s closure in 1962. Further details of the weapon including the deterioration evident, materials used, and the style of components will help further narrow the date.

Markings are not absolute indicators

More than a familiarity with makers marks is required to fully approximate a weapon’s manufacturing date and provenance. Not to mention that makers marks were also sometimes counterfeited…

In order to accurately assess the age of a sword experts employ knowledge of the evolving material choices, assembly techniques, and manufacturing trends to isolate a probable date in the timeline. Experts of classical fencing swords also know when variations of swords were popular and when the fencing masters or schools who created them were active. The maker and country of origin marks are valuable tools to date fencing swords but are not absolute indicators of age or make.

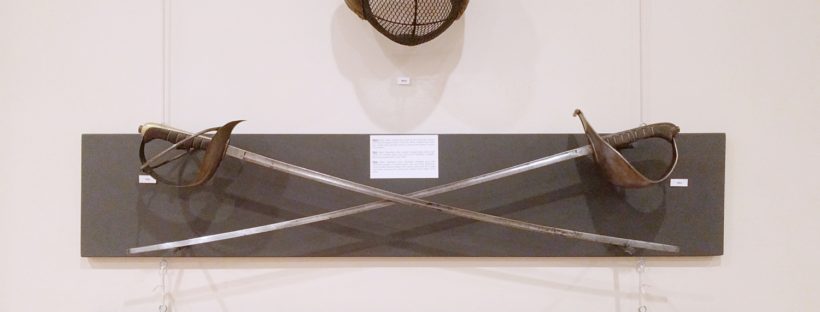
Antique sabre mask, crossed dueling sabres and Italian epee

Fencing Weapon Exhibit at La Nacional in New York City

Fencing Weapon Exhibit

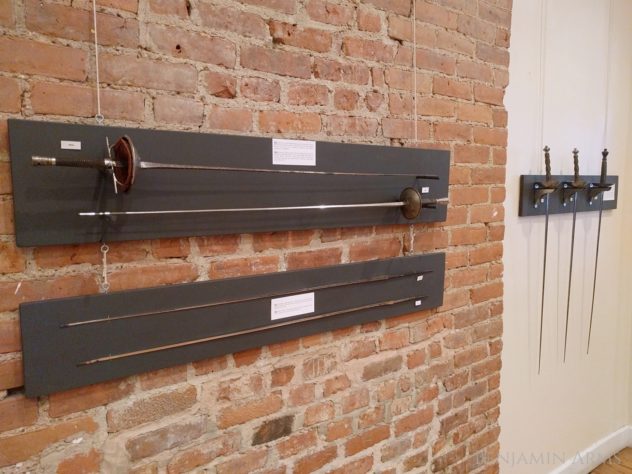
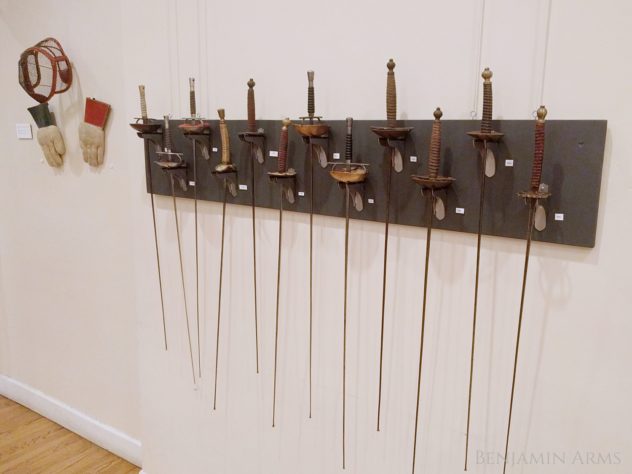
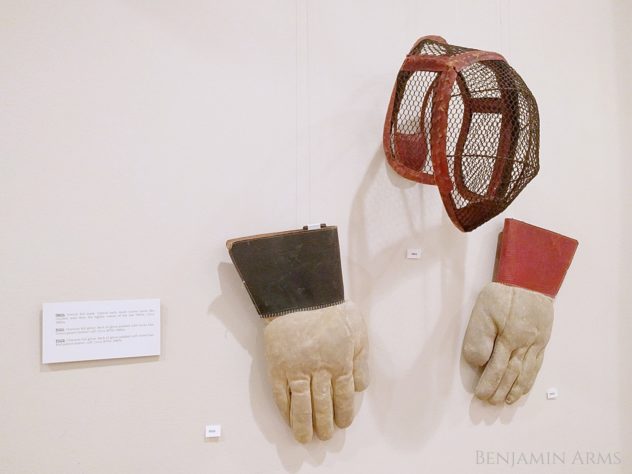
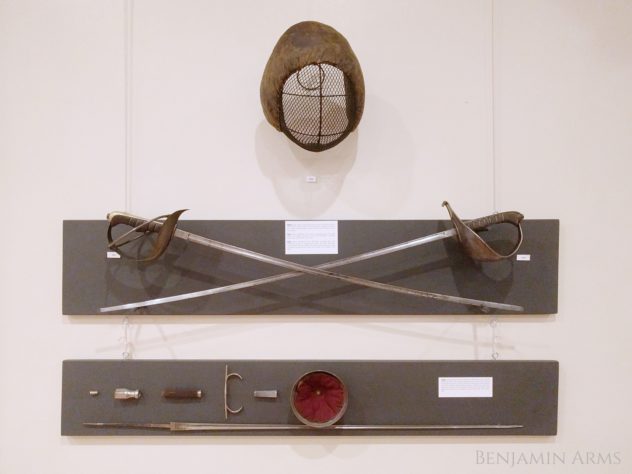
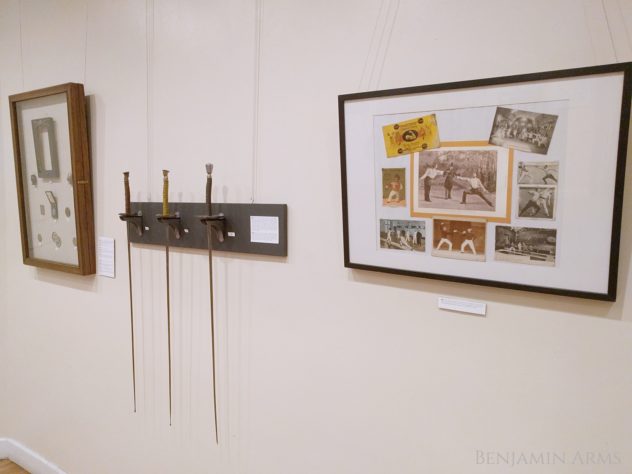
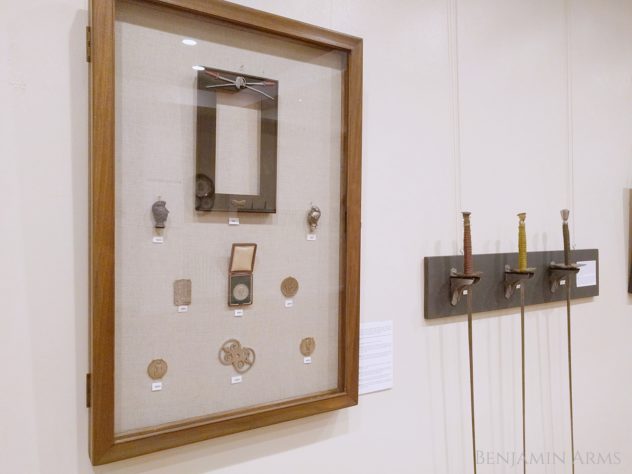
Benjamin Bowles, owner and swordmaker at Benjamin Arms co-curated the 19th Century Fencing Weapons & Memorabilia Exhibit at La Nacional in New York City on October 20th, 21st, and 22nd. The exhibit featured forty items including fencing weapons, medals, postcards, statues, masks, and more from the private collection of Jeannette Acosta Martinez. This fencing weapon exhibit was open to the public at La Nacional-Spanish Benevolent Society in New York City. The Friday opening included a walk-through by curators Benjamin Bowles and Jeannette Acosta-Martinez of the Martinez Academy of Arms detailing the importance and manufacture of each object.

The fencing weapon exhibit detailed how weapons, plates, statues and the rest were all fine examples of decorative arts, and in many cases were representative of the excessive material culture of the 19th century. Benjamin lectured on the manufacturing methods and ideology of the 19th century, stressing how each weapon in the exhibit, regardless of its decoration, was still a fully functional tool hand-assembled at the final stage.

19th Century Manufacturing Trends

The production of fencing weapons in the 19th century reflect manufacturing trends of the time. Weapons were produced quickly and at unprecedented numbers. The new mass-manufacturing methods, however, did not fundamentally alter the ways of their production, only the rapidity and quantity. Blades continued to be forged, however now assisted by hydro-powered trip hammers in France, and steam or diesel-powered mechanical forges in Germany. Guards, crossbars, and pommels were still cast in brass or bronze, but were produced rapidly and reliably using permanent steel moulds. The weapons were still hand assembled and finished. The resulting product met demand without sacrificing the manufacturing methods crucial to the product’s functionality.

At the same time, artisans fearing the loss of their expertise to mass-production demonstrated the greatest capabilities of their skills by ornamenting luxury models. In Solingen, Germany, where sword and knife companies dominated the world market due to their manufacturing ingenuity, specific craftsmen called die Einsteckreider built the most precious weapons with a level of craftsmanship and detail unobtainable in a factory. Ornamentation on fencing weapons included acid etching, hand engraving, bluing, nickel plating, or gilding of the blade or hilt components. Some were made completely unique by utilizing one-of-a-kind and hand-made parts. These elaborate weapons were built to be the completely functional fencing swords of the upper class.

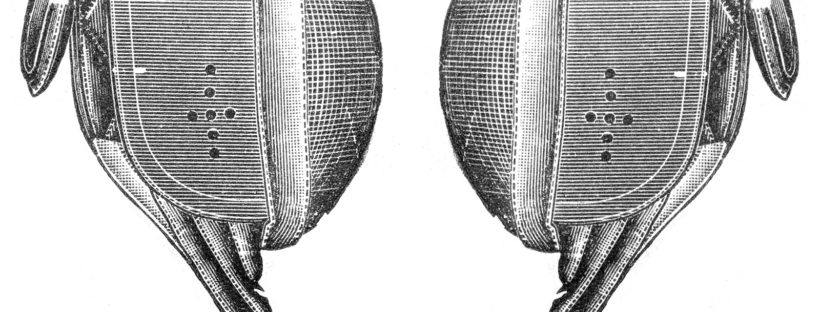
How to clean a fencing mask

How to Clean a Fencing Mask

It’s easy to clean a fencing mask! We’ve detailed our methods for keeping your mask in it’s best, lustrous condition. Remember that regular cleaning will make future cleanings fast and efficient.

How to Clean a Fencing Mask

Warnings: Manufacturers of fencing masks know the specifics of maintenance more than can be detailed here. Check for manufacturer cleaning instructions before considering any advice given here. It’s very important to never use bleach on fencing masks and bibs. Bleach will deteriorate the bib’s puncture resistance.
Washing: Use a large, clean bucket immerse the mask in warm water with a few capfuls of Rit Whitener & Brightener and a laundry detergent of your choice. Don’t use OxiClean as it will cause any exposed metal to instantly rust! Work the soap into the bib with a semi-hard plastic bristle brush until stains are removed. Rinse thoroughly and squeeze out as much water as possible before air drying at room temperature. It may take a day or two, depending on the climate.
Stain Removal: Really stubborn stains (like rust, coffee, or blood) can be removed safely with the same spot removing technique we use on jackets.

the Mesh

Punch Test: Use your own or your school’s punch test to guarantee the strength of the wire mesh. The mask protects your face, and you should know if it will do it’s job. Punch tests are available at many sport fencing suppliers. Test as many points on the mask as you’d like, but we recommend at least 10 spots.

Cleaning the Mesh: Most modern masks are coated in a protective plastic or paint which may scrape off with use. Any exposed mesh may rust. Use a wire brush, steel wool, or abrasive cleaning pads to remove rust. Be careful not to spread the rust onto the fabric of the mask when cleaning. Coat those exposed areas with wax or Rustoleum paint to prevent future degradation.

Prevention & Post-Use Care

Separation: Separate your fencing mask from other equipment, especially steel weapons. Transport your mask separate and isolated in a cloth bag (a pillow case is perfect). Do the same for your jacket, pants, gloves, etc to keep all your equipment clean.

Air Dry After Use: Have a dedicated space in your closet or bathroom with enough hangers to air dry all of your equipment after use. It should only take a few hours to dry and will keep your clothes from growing mildew.

Special Techniques

Rust: Spot clean a fencing mask with the recipe we use on jackets.

Sweat Stains: Ivory soap has been around since 1879 and is a fine product. It’s incredibly good at dissolving natural oils making it useful to remove sweat stains & body odor. If you have some particularly tough stains on the mask’s bib, try hand-scrubbing with Ivory soap.

Odors: Arm & Hammer Baking Soda (sodium bicarbonate) shouldn’t only be found in your refrigerator or cupboard. Add a cup of baking soda when soaking the mask to balance the pH of the water to make your detergent more effective and help remove odors.

Blood: Take extreme care with blood, even your own! Be considerate of the possible biological contagion blood presents (which is probably minimal), but more so people’s psychological fears of it. Spot clean a fencing mask as quickly as possible and properly dispose of any cleaning materials containing blood.

Map of Classical Fencing Schools


About Classical Fencing Schools

Classical fencing schools foster self-reliance, self-confidence, grace of carriage and movement, as well as courtesy, good manners, and a high level of etiquette. They also instruct a healthy all-around exercise and constructive release of the stress.

Classical fencing is the final development of European swordsmanship, which came into its full form during the late 19th, early 20th centuries. Classical fencing consists of three weapons, namely the foil, the épée (or dueling sword), and the sabre, and two primary schools: the Italian and the French. These two schools differ in their mental approach, weapon design, technique and form.

This age is distinguished by the art of the foil, which masters thought to be the fencing weapon par excellence. With this refined tool, the most sophisticated and artistic maneuvers are possible. However, the use of the sword as a deadly weapon was always borne in mind and the training was serious in nature. This distinguishes classical fencing from Olympic fencing.

Joining the Map

Classical fencing schools are spreading across the united states as interest grows and more instructors get trained. The map is filling in! This map is curated by Benjamin Arms and features established schools predominantly instructing classical fencing. We will not link your school if you principally teach Olympic fencing! Use the contact form below to submit your school’s information for review.

[wd_contact_form id=”10″]

How to clean a fencing jacket

How to Clean a Fencing Jacket

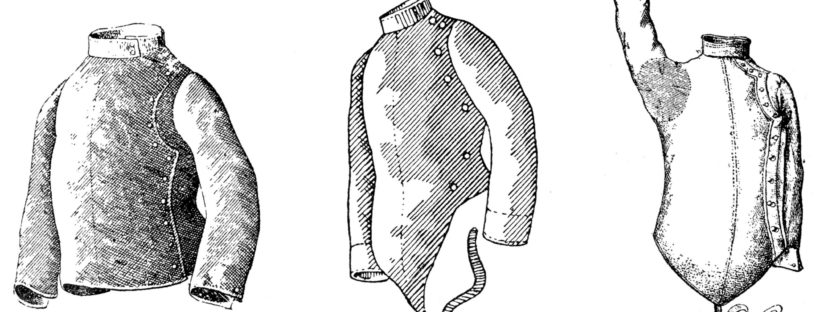
Fencing Jackets are traditionally made of white canvas and cotton batting. You may clean a fencing jacket easily, but find it difficult to keep lustrous. We’ve detailed our tried and trued methods below for keeping jackets in their best condition. Remember, regular washing will make future cleanings fast and efficient.

Prevention & Post-Use Care

Separation: Always separate your fencing clothes from other equipment especially steel weapons. Transport your jacket and gloves separate and isolated in cloth bags (a pillow case is perfect). Do the same for your mask, pants, etc. Keeping sweaty cloth away from steel prevents rust stains. Don’t rest your jacket on dirty surfaces between use. Politely request your opponent not rest his or her weapon’s tip on the ground to prevent transfer onto your jacket.

Air Dry After Use: Have a dedicated space in your closet or bathroom with enough hangers to air dry all of your equipment after use. It should only take a few hours to dry and will keep your clothes from growing mildew.

How to Clean a Fencing Jacket

Warnings: There are many manufacturers of fencing jackets who know the specifics of their garment more than can be detailed here. Check the manufacturers cleaning instructions before considering any advice given here. When you get a new jacket wash it before use removing any chemicals from the manufacturing processes, and any excess dye. It’s very important to never use bleach on fencing jackets. Bleach will deteriorate the jacket’s puncture resistance.

Washing: Machine wash the jacket alone or with other washable, white fencing garments (like underarm protectors or knickers). Use cold water unless you’re certain the jacket has already shrunk (or if you’d like it to). Cold water should not shrink the jacket. We recommend using OxiClean White Revive to clean and brighten jackets. If you have sensitive skin we recommend running the jacket again with a detergent of your choice after a wash with OxiClean.

Drying: Allot enough time after washing to hang and air dry the jacket. Air drying has the least chance of shrinking the jacket. If necessary use a machine dryer but on the lowest heat. High atmospheric heat may also shrink the jacket, so don’t air dry outside in 100 degree weather!

Soaking: Soaking the jacket can help remove stubborn stains and make machine washing more effective. Immerse the jacket in a cleaned basin, tub, or bucket with cold water and OxiClean White Revive according to their soaking instructions. Do not mix garments; soak one at a time! Use enough water to submerge the garment but not dilute the solution too much. Soak for at least an hour and repeat if necessary. If there’s some really tough stains and discoloration soak the jacket with a few capfuls of Rit Whitener & Brightener. Agitate the garment occasionally in the soaking solution by hand. Once the stains are gone or diminished follow the washing instructions above.

Stain Removal

Don’t Let it Set In! So you spilled your cappuccino on your fencing jacket? Don’t panic! You can fix it! Take the jacket off off and sponge up the liquid with a dampened paper towel. Get as much of the stain out by blotting only, don’t wipe, scratch, or smear! Wash the jacket as quickly as possible after blotting the stain, but do not dry until the stain is gone. Repeat soaking, washing, or spot removing prior to drying. If you dry a jacket with sweat or spot stains it “sets them in” making them far harder to remove

Stain Removing: Stains can be very stubborn and will tempt you to break the ‘no bleach’ rule. Don’t do it! The best technique we’ve developed requires sunlight, salt, and lemon juice:

Benjamin’s Spot Removing Technique
In a small bowl or ramekin stir together until mixed:
-1/3 cup room temp. lemon juice
-1 tablespoon salt
After blotting the stain (see above) and washing in OxiClean (see above), hang the jacket outside and expose the stain(s) directly to the sun. Using a spoon or eyedropper, bead drops of the mixture onto the stain until saturated. Set in direct sunlight and reapply the mixture as it dries. Repeat until the stain is removed. Rotate the jacket to keep the stain directly facing the sun.

Special Techniques

Rust: See above spot removing technique to clean a fencing jacket of rust stains.

Sweat Stains: Ivory soap has been around since 1879 and is a fine product. It’s incredibly good at dissolving natural oils making it useful to remove sweat stains & body odor. If you have some particularly tough collar or underarm stains, try hand-washing the jacket with Ivory soap.

Odors: Arm & Hammer Baking Soda (sodium bicarbonate) shouldn’t only be found in your refrigerator or cupboard. Add a cup of baking soda when machine washing your jacket and it will better balance the pH of the water making your detergent more effective and help remove odors. You may also clean a fencing jacket with detergents specified for athletic wear.

Blood: Take extreme care with blood, even your own! Be considerate of the possible biological contagion blood presents (which is probably minimal), but more so people’s psychological fears of it. Spot clean a fencing jacket with the above mixture as quickly as possible and properly dispose of any materials containing blood.

How to attach a leather foil button

How To Attach a Leather Foil Button

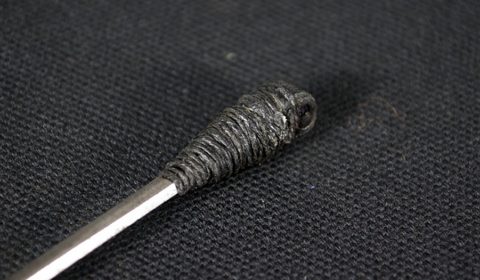
Leather foil buttons are the traditional point covering for fencing weapons. A strip of leather covers the blade’s nail head and a strand of tightly-wound waxed cord secures it in place. It’s a simple and elegant button made with with traditional materials. The lifespan of a leather foil button largely depends on use, but averages about six to eight months when fencing multiple times a week.

Leather foil button

What You Need

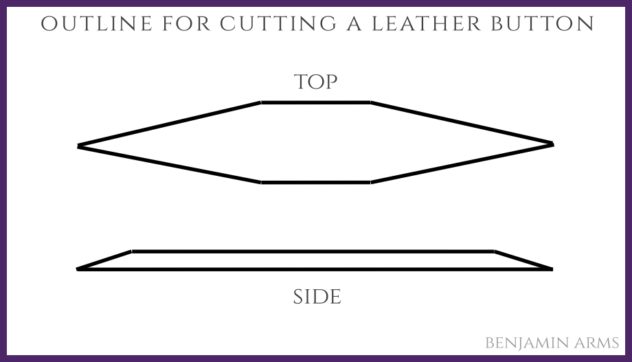
  • Pliable leather ~ 1/8″ thick, as wide as intended nail-head. Cut into a elongated & tapered diamond:

Cut outline for a leather foil button

Prepare Blade

Cleaning blade for leather button

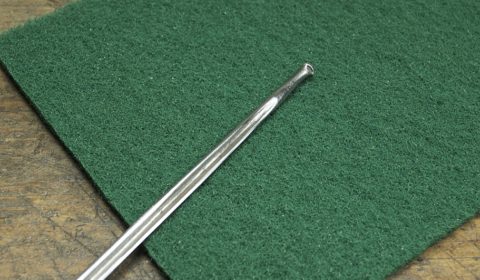
Remove the existing button and the residue it may have left behind. Use a scouring pad to completely clean the blade of rust and adhesives.

Fixture Blade

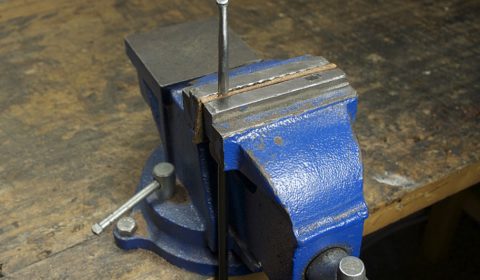
Fencing blade in vice clamp

Use a vice to hold the blade in place while you work. Use pieces of leather or cloth on either side of the vice jaws to prevent damage to the blade. It’s possible to do this without a vice but it will be more difficult to wrap tightly and securely.

Anchor Cord

Waxed thread for leather foil button

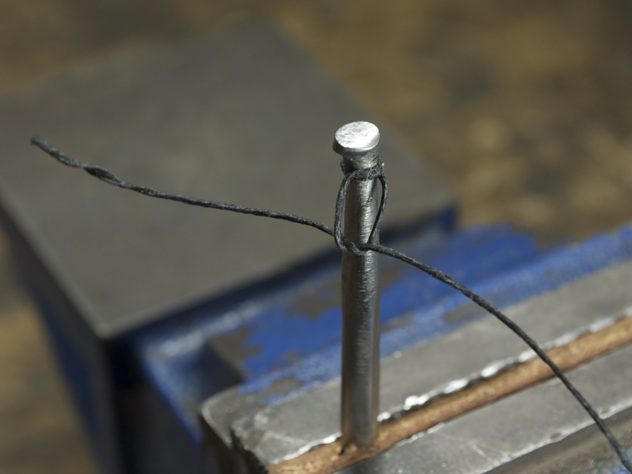
Anchored waxed thread on fencing blade

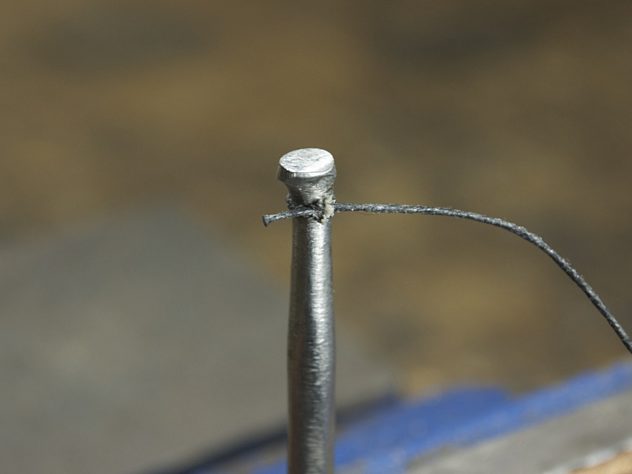
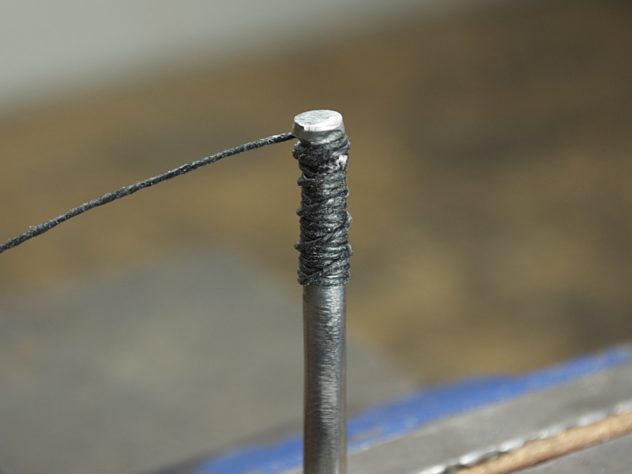
Anchor the waxed cord to the blade with a double knot just below the nail head. Trim cord about a quarter inch from knot.

Set Base Wrapping

Base wrap of leather button

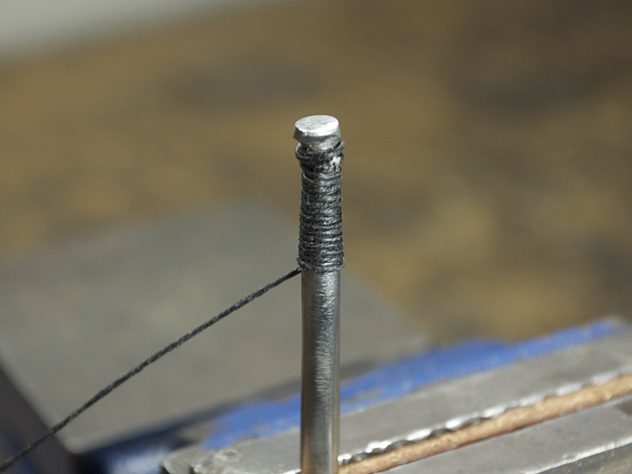
Base wrap of leather button on fencing epee

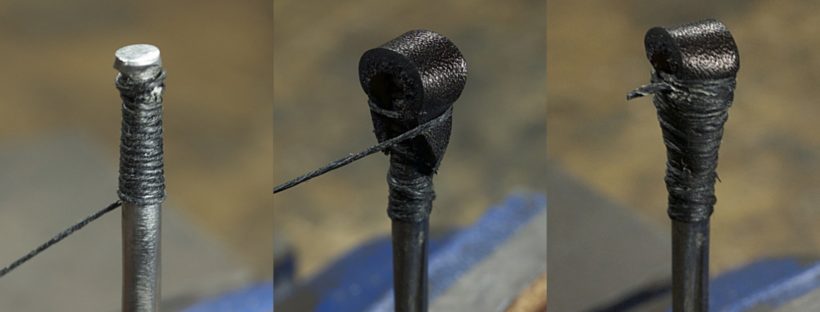
Wind the waxed cord evenly down the blade about an inch. Larger nail heads should be wrapped about 1.5 inches. Once at the bottom, wind the cord back up to just below the nail head with even spacing.

Set & Align Leather

Aligning a leather foil button

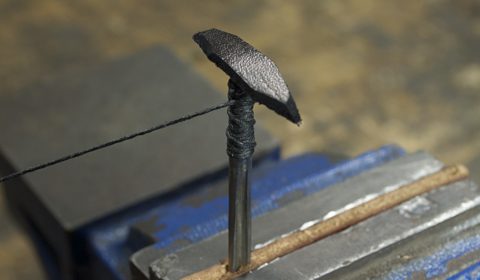
Set the leather strip pointing towards you atop the blade’s nail head.

Loosely Secure

Leather button on fencing blade

Loosely tying leather button

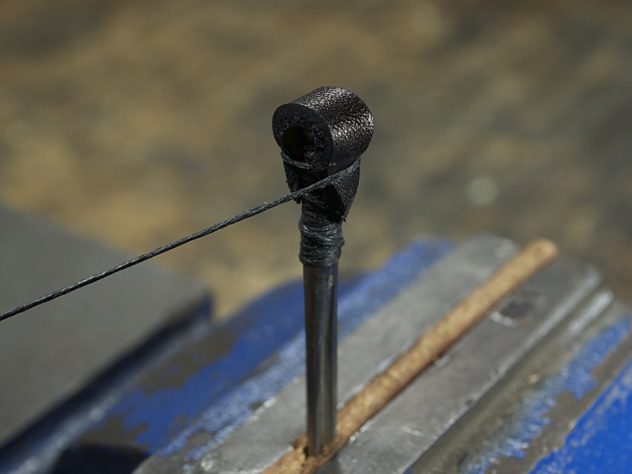
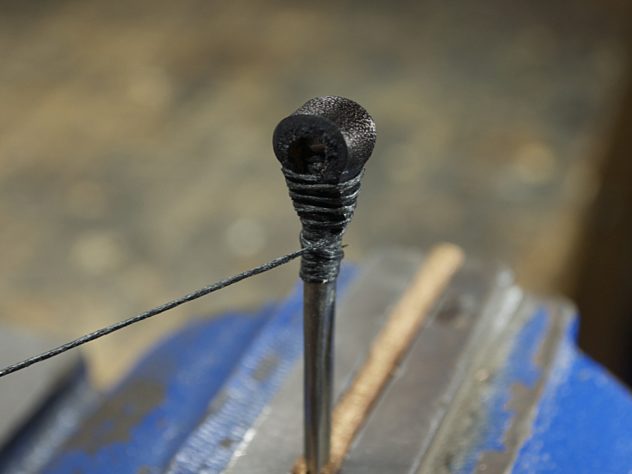
Fold the leather over the nail head and wrap the cord from just underneath the nail head down to the bottom of the folded leather. Wrap moderately tight with spacing between each rotation to simply set the leather in place.

Tightly Secure

Tying leather foil button

Once the leather foil button is loosely secure so that it wont twist or immediately fall off, increase your cord’s tension and start tightly wrapping the button in the same manner as the last step. Continue wrapping until the point is completely secure. Test the fitting by trying to displace the button side to side. The button should not move or shift when wrapped tightly and correctly. Wrap the leather button’s sides as needed to give an even taper and transition from button to blade.

Tie Off

Finished leather fencing button

Finished leather foil button

Tie off the cord with a few double knots just below the nail head. Pull the knots tight so that the waxed cord sinks into the wrapping and squeezes off excess wax. Trim the cord about a quarter inch from the wrapping.

Finished!